Tuesday, January 30, 2007

100 and it's all for me!

This is post #100 -- Yay me!

And this is my new hat:


It is Wendy's Easy One-Skein Hat, found at p. 24 in her book, "Wendy Knits".

For most people, this pattern makes a lovely hat using one skein of Noro Transitions. However, I have a two skein head! I modified the pattern slightly, to accommodate my extra large noggin. I used a US10.5 16" circular needles and DPNs to decrease, rather than the US10 DPNs suggested in the pattern. I cast on 78, instead of 72, stitches. I used part of a second skein of yarn, instead of one skein. On my last decrease row, I k3tog for one of the required k2togs. I think it looks pretty good!

Saturday, January 27, 2007

Saturday Sky, Saturday "Eye Candy" and knitting!

It has been a while since I posted a Saturday Sky. Today, I remembered to take my camera with me when I drove out. After visiting my local yarn shop, I snapped a picture of its sign with the afternoon moon above.


On the way home from my LYS, I stopped for gas at the WaWa and noticed this bit of Saturday Eye Candy. This "Eye Candy" caught the eye of everyone. But, it was a "stop in your tracks" experience for most of the guys ... every guy that got out of their car or came out of the store. You never saw so many guys want to hang around at the WaWa!


This yarn (Noro Transitions) is now well on its way to becoming a Hat for me!


This is a sneak peek of a Secret Pal gift in progress. Final pictures and details after I send the packages off on Monday.

Tuesday, January 23, 2007

I tried to change. Try something new.

But I couldn't quite figure out what to do.

I suppose I have to read up on CSS and HTML and such to get the buttons and links and things to show up like I'd like.

In fiber news, I swifted to the ball winder all my first Dyes. Now to figure out what to do with each one! :)

Monday, January 22, 2007

Testing, testing

I am making a 'test-a-long' square for Larissa - using beautiful yarn from Cabin Cove Mercantile and Larissa's Knit-A-Long square pattern (designed by Shelley Mackie of Fun Knits) on size US2 DPNs.

I wanted progress pictures, but my camera has befuddled me (I can't find the directions, will continue looking) with my inability to take close-ups. Everything goes blurry.

When I bought this camera (Canon Powershot S1IS) as my special treat in 2005. I researched and could have sworn I had picked out a camera that could take extreme close-ups. That was one of my requirements when searching.

Reading a lot of different blogs, I read about the "flower" setting on different cameras. My old camera had a flower (Kodak, though I never used the flower setting not really knowing what it was until now and having no need for close-ups then as I did not knit nor did I blog). My mom's new camera (Vivitar) has a flower setting. Alas, Canon has no such thing. At least MY Canon has no such thing.

Reading around the blogs today I clicked into a blog - SplitYarn - with a post about taking great pictures on the cheap (well, she doesn't call it cheap. That is my word, but essentially a few inexpensive items gives her BEAUTIFUL pictures!). She spoke about macro settings (that "flower" setting) and museum and custom settings. I looked at my camera and sure enough there was an M which, when selected, took excellent close-ups - no blurring. But I definitely have to work on the light situation! :)


(1) close-up without flash - too dark, but definitely not blurry!


(2) close-up with flash - bad color, all that purple is really dark brown - not blurry!

What I did on Sunday.

On Sunday, I ventured out of my comfort zone. With the full knowledge that snow followed by freezing drizzle may come out of the sky during the day and into the evening, I ventured to Mama-E's Dye Class.

I brought a few skeins of natural superwash wool in various weights - about 24 oz. worth - which was split into 6 individual 4 oz skeins.


I painted with kool-aid. (light blues and greens)

I squirted Wilton's based colors. (bubble gum pink, purple and blue)

Then, acid dyes - 4 oz. skein with Turquoise and Royal Blue (wish I had done more of this!); 4 oz. skein with Mahogany and Paprika; and 8 oz. (2 - 4 oz skeins) in shades of green (Shamrock and Dark Meadow) with a touch of Saffron.

All hanging here on the étagère drying. I'll take better pictures of the individual hanks when they are dry and I can hank 'em up!
This was a great learning experience. I'm not sure I'm ready to start up a dye shop in my house, but I had a lot of fun and would definitely do this again.
I highly recommend Mama-E's class to everyone interested in learning more about the dye process. The small class size allows for hands on instruction, guidance, encouragement! Thanks, Mama-E!
Keep watching out for Mama-E's new classes. I understand she plans to offer these kinds of classes each month, and some others (I heard Dye 4 Socks with a follow on class to learn to knit the socks with your own hand-dyed yarn!)

Sunday, January 14, 2007

My Red Scarf

Here is my red scarf for the Red Scarf Project 2007. Light is not so good. The pictures with a flash were worse. But, I've been sick and the weather has been overcast... so this is as good as it gets for 'true' reflection of the item.


Pattern: I loosely followed a cable scarf on display at my LYS (one of the employees wrote up a brief pattern for her bulky wool scarf on display - I added a few stitches to make it wider for this project):

Needles: US13 16" circular (just because I like circs! :) You could use a single point US13; 1 - US13 DPN for the cable.

Yarn: Plymouth Yarn Encore Colorspun, Worsted Weight - 75% acrylic/25% wool
Color # 7131, 2 skeins (3.5 oz, 200 yards)

Using two strands of worsted (or 1 strand of bulky wool):

CO 18 stitches

Row 1: K4, P2, K6, P2, K4
Row 2: K6, P6, K6
Repeat for rows 3-10
Row 11: K4, P2, Cable over K6, P2, K4
Row 12: repeat row 2

Repeat rows 1 through 12 until desired length. I ended at row 10 on the last repeat.

Add fringe, if desired.


Hmmm... layout is messing up... edited to see if this line will fix it!


Saturday, January 13, 2007

Who knew?

Who knew laryngitis could be so painful? I thought I'd had it before - but I've never had this kind of pain in my throat - where it even hurt on the OUTSIDE of the larynx! So, I must have only ever lost my voice, called it laryngitis without actually ever having laryngitis. I think I would have remembered this level of pain!

Saw the doctor on Friday - diagnosis: Acute Sinusitis and Laryngitis. Prescriptions written and filled. I have been sleeping a lot. In between naps, I've been trying to knit the decreases on a hat. Every third row, I do something wrong. So, I have given up until the weariness left by the pain and the meds abates a bit more.

I think I'll be closer to normal tomorrow -- though no guarantee that anyone will be able to hear me speak by then. I'm still barely squeakin'!

I did finish my red scarf - Yea!! Pictures tomorrow - if the light cooperates. Or maybe even if it doesn't. I need to get it ready to send off. One of my resolutions intentions for 2007, "MAIL the things you make on time!" It seems I am often done before the deadline for any given cause, but fall down on the packaging and sending of items. I intend to improve this year!

Tuesday, January 09, 2007

slow start

I feel like a turtle. I'm hoping that slow and steady does indeed win the race. Not that I'm racing or anything!

In the Spring, when the flowers are budding and grass is growing and trees are leafing, I get allergies. Congestion, sinus issues, scratchy-then 'sore to swallow' throat problems, sneezing, wheezing... not enough for allergy shots, but plenty to be uncomfortable.

WELL... Spring came to DC this past weekend. Record breaking HIGH temeprature of 73F. It is been very warm for weeks now and the grass is growing, the neighbors are MOWING!!! My throat feels like I swallowed sandpaper! :(

On top of that, I'm dealing with family issues that keep the stress at a pretty high level. I'm working on destressing, but with the general icky allergy feeling and the stress, I REALLY want to be the turtle, a box turtle, that could just crawl in my shell and hide!

Knitting is slow. My available knitting time is choppy. I find if I don't finish a repeat, or a row, or some equally logical place, I end up ripping it all out and starting again.... making the process just that much slower! I 
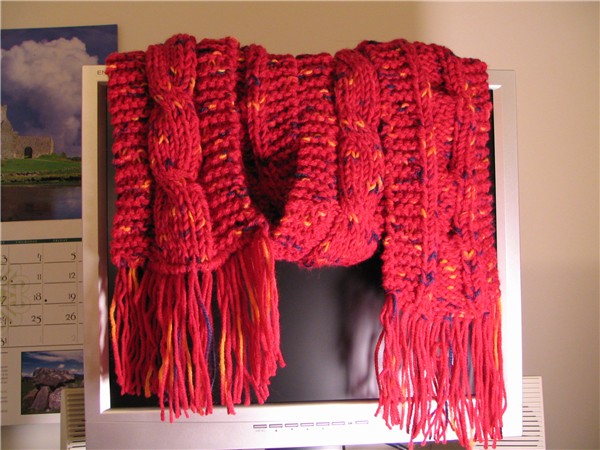
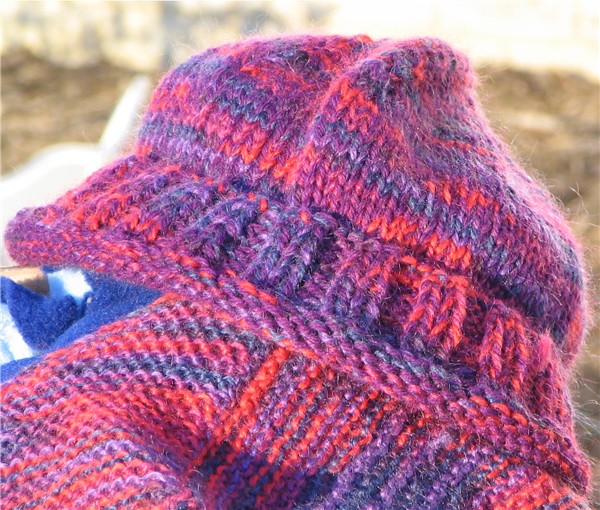
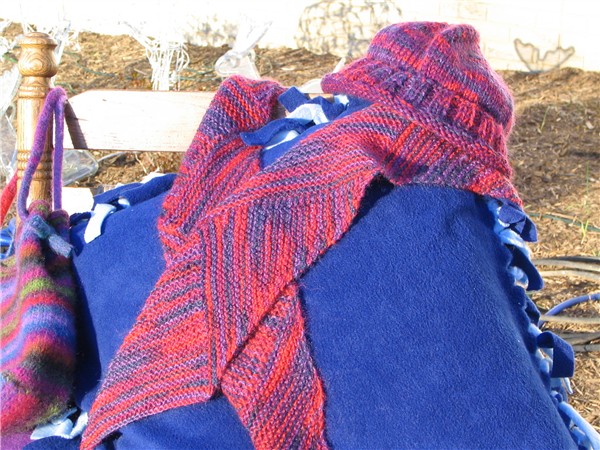
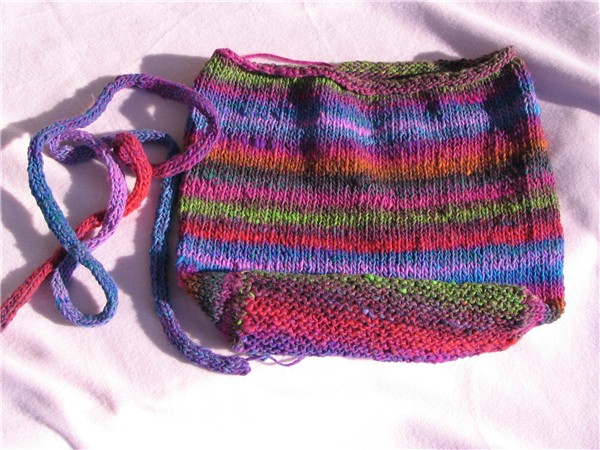
will finish my red scarf this week! However, all my other projects are "as slow as molasses going up a hill in January!"*

Good news - three day weekend with NO, and I mean nothing, nada, to do for anybody but me! So, I can clean and organize - if I want. I can sleep - if I want. I can sit around in my PJs and celebrate a delayed IPD (International Pajama Day)... I can knit, I can scrapbook, I can cook, I can do whatever my heart desires! At least, that is what is looks like today! :) Now, just hoping that the cooler, more seasonal weather that has arrived in our area stays for a while and puts all my allergans to sleep so I can feel better!

* A favorite quote from Sr. Eileen Patrice, circa. 1969!

Thursday, January 04, 2007

Christmas Finale, finally!!!

Christmas Finale!
pictured: Booga Bag; Multi-Directional Scarf; Hat; 3 No-Sew Fleece Pillows


Booga Bag:
Kureyon, Color 134.
First Felted Project and I'm quite proud!
(you can see it pre-felted here)
Hope my sister enjoys this!


The hat is knit with one strand of Wool in the Woods Southern Rose, colorway: Poppy Patch, and one strand of Cascade 220 in a complimentary purple, whose band has been lost so I can't give you the color! :) I can't remember where I got the pattern, but I modified it a bit anyway - Cast on 88, K2P2 cuff, stockinette body, typical k2tog decreases for the crown.
I ran out of the Poppy for the last two rows and double stranded the purple, but you can barely notice (see close-ups previously posted)


Multi-Directional Scarf
Single strand of Wool in the Woods Southern Rose, colorway: Poppy Patch

My scarf came out a bit different from the other's I've seen. I have points at both ends. Guess I missed a step somewhere. But I think it's pretty darn cute anyway.


The Pillows are two 31" squares of complimentary fleece, wrong sides facing (if you can figure out the wrong side!) with a five inch square cut out of each corner and strips 3/4" wide cut five inches deep on each side. Two strips, one of each color, are tied together with an overhand knot. Tie together three sides, insert 20" pillow form, then tie up side #4. Voilá! Floor pillows for the Nintendo/X-Box/PS-2 crowd! :)

Now I can start on 2007!!!!!!